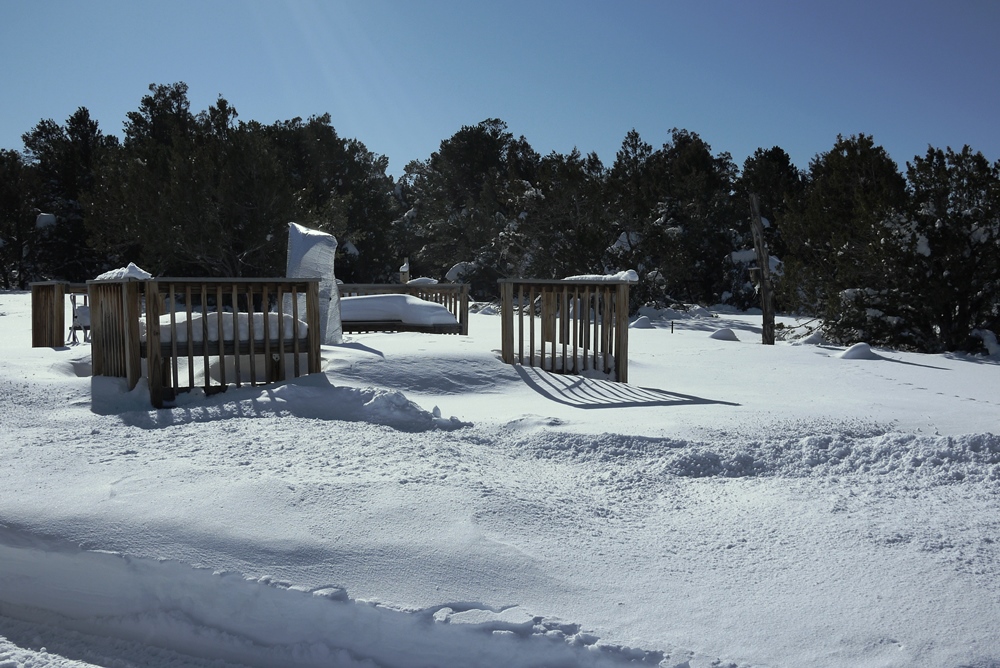
Observation Deck
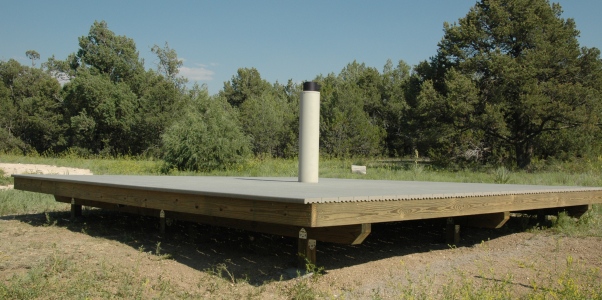
Shortly after we moved to our current house, we decided we needed a better place to do astronomy than the driveway. So we built an observation deck. The deck is 16 feet square with a permanent pier in the center. It is a wonderful place to view, photograph, or just stretch out on a lawn chair or blanket and watch the sky go by.

This is the largest construction project I have yet to do. After a lot of reading and planning, I was ready to begin.
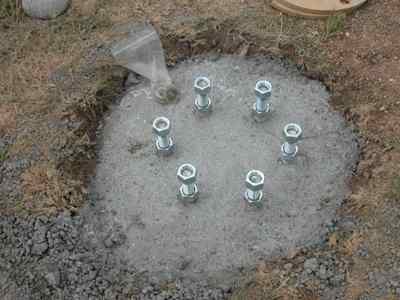
First, I dug a hole, two feet in diameter and four feet deep. A cage of rebar and wire gave me something solid to connect six 18 inch long 1 inch diameter all-thread bolts to secure the pier. I cut two MDF templates to match the pier's bolt pattern and used them, a couple of 2x4s and some stakes to hold hold the bolts in place. 18 bags of Quikrete later, I had a pier footing.
After letting the concrete dry and cure for a couple of weeks, I put the pier
on and was relieved to see that it did fit and was very solid. I used three
bolts to level it and then tightened up the other three to ensure a very
solid connection.
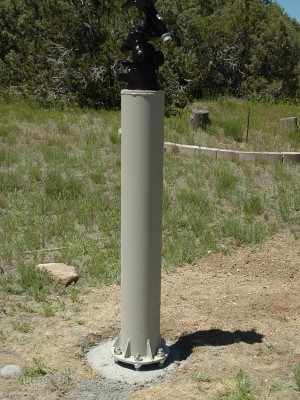
Here is the pier with the G11 head mounted.
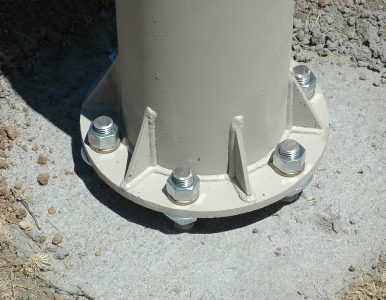
The pier is an piece of 8 inch diameter schedule 40 steel pipe. The base plate is a 14 diameter 1/2 inch steel plate. The top plate is also 1/2 steel and has a 1/2 inch grade 8 bolt sticking up through it. The bolt is welded to the underside of the plate and provides a sturdy, secure mounting point to attach a Losmandy Meade field tripod adapter. I also drilled through the adapter and top plate to install a 1/4x20 bolt to prevent the adapter from rotating.
OK, the pier plan that I started with was probably over-engineered.
It used 8-inch diameter schedule 80 pipe and had 12 braces between the
pipe and base-plate. After a bit of discussion with astronomer friends,
I decided that I could get by with only 6 braces, but I did increase
their height. After finding a used piece of schedule 40 pipe the correct
height and about a 6th of the price of new schedule 80, I decided that
the pier's wall thickness can be 0.322 inches instead of 0.5 inches.
It also made the pier a lot lighter; I could move it and lift it onto
the mounting bolts myself.
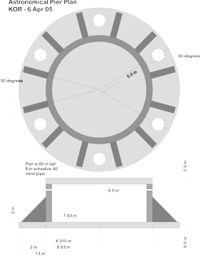
The first diagram to the left is my original pier plan before the changes described above.
The pier was built by Troy's Welding Inc, in Albuquerque. They had never done anything like this before and thought I was a little crazy--until I gave them a print of M-42. They did a great job.
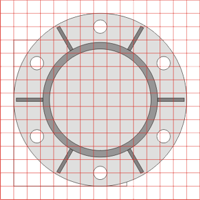
The second diagram is the pier base template and shows the positioning of
the 6 braces and bolt holes. The red grid is one-inch spacing. I printed
this out full-size on heavy card stock and the welder used it to fabricate
the pier.
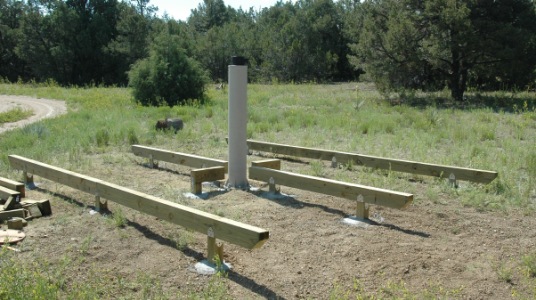
My wife and I did most of the deck construction over the 4th of July weekend 2005. The posts are 4x4 treated wood in 2 ft deep concrete footings. Digging the 12 footings was the hardest part of the entire project. Our dirt is not very conducive to digging ...
The foundation beams are 4x6 treated wood connected to the posts with metal ties. The area around the pier was strange as the middle beam was interrupted and I needed something to support the middle joists and attach the frame for the pier cutout. The beams are spaced for a 6 foot joist span.
The joists are 2x6 treated wood, 16 ft long to preserve strength. They are
tied to the end boards with joists hangers and to the beams with metal angle
brackets. Joists are spaced on 16 inch centers.
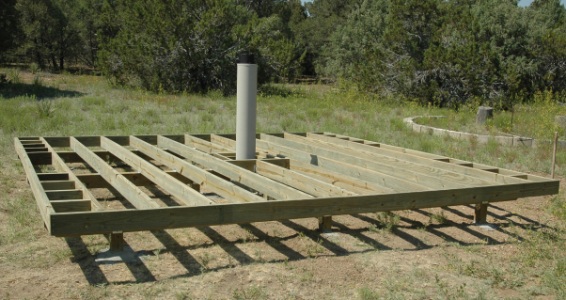
The decking is ChoiceDek, a synthetic decking material. Though it is more expensive than treated wood, it needs no sealing and will last for a very long time. It is also straight, something I cannot say for lumber available anywhere I have seen. The ChoiceDek is really easy to work with; it cuts and drills easily, perhaps easier than real wood.
The decking is screwed to the joists, three screws per board per joist. That is
a lot of screws! I am hoping that between the decking and the angle brackets on
the beams, that the joists will remain straight and not twist over the years.
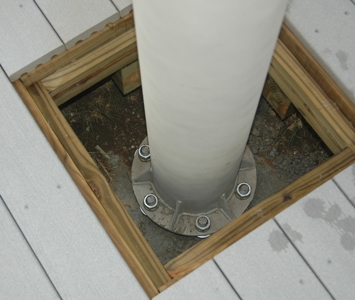
The cutout for the pier has a section that slips in from each side to provide a
1/2 gap between the deck and pier. If I ever decide that I don't need the pier,
I can replace the cutout insert with a solid insert. But why would we ever do
that ...
Over the next few weekends, I added the rails, benches, and steps, as seen in in the photo at the top of the page.
Update 2013: It's now over 8 years later. The decking is still in really good condition though it could probably use a sanding. The treated wood, however, has had a rough life in New Mexico's very sunny summers and very cold winters. Soon, it will time to rebuild the rails. We also had a joist break creating a dip in one corner, so we need to get underneath the deck and scab it back together.