ElectroLuminescent Flat Field Box for One Shot Color Cameras
This page shows and explains the procedure that I went through to create a electroluminescent panel based flat field box suitable for use with a one shot color camera. This works well with the SBIG ST-8300C camera and should function just as well for any camera based on the Kodak KAF-8300C sensor.
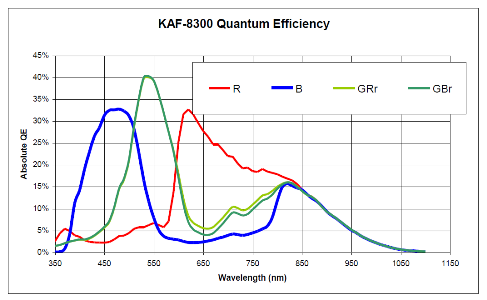
One Shot Color cameras complicate flat field exposures since the Bayer mask causes each color of pixels to have a different sensitivity. Unlike monochrome cameras with individual filters, you cannot alter the exposure for each filter color. The graph, right, shows the quantum efficiency of the sensor by wavelength. As you can easily see, the Bayer mask makes the chip more sensitive to some wavelengths than to others. (Source: Kodak KAF-8300 Image Sensor Device Performance Specification)
In good flat field frames, the exposure duration is set so that the level of each pixel is in the range where the chip responds linearly. According to The Handbook of Astronomical Image Processing you should aim for about half of the dynamic range of the sensor. For the KAF-8300C, we try to expose so that the average pixel value is about 33000.
Knowing the peak response of each color pixel, I made a flat field box using red,
green, and blue LEDs chosen specifically to match the sensor. I still had to add
some resistors to balance out the level, but it worked very well. Unfortunately,
in order to allow room for diffusion to get the field flat, the box turned out rather
large. I built it to fit the 10 inch RC and it ended up being a 14 inch cube. It will
not fit between the telescope and dome in the observatory. It was at this point that I
started looking at electroluminescent panels.
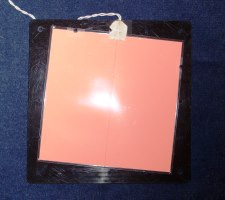
EL panels get expensive as their area increases. The power inverter necessary gets larger and more expensive also. Since I did not know whether this was going to work, I decided to make one for the 5 inch refractor first. This would keep the expense down and, if it didn't work, I'd have a cool new toy to play with. I bought a 6 inch square split electrode panel and a small inverter from LuminousFilm. The panels are made by E-Lite Technologies and are marketed under the trademark FLATLITE.
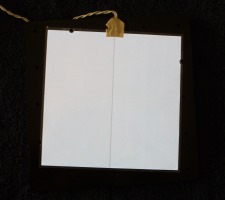
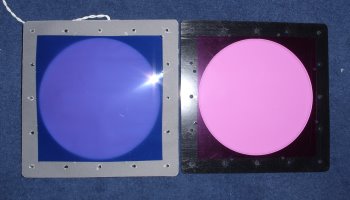
The panel is pink when off and looks very white when turned on. It has a line down its center. To use it as a flat field illuminator, you have to add a diffuser to eliminate the line in the flat field frames.
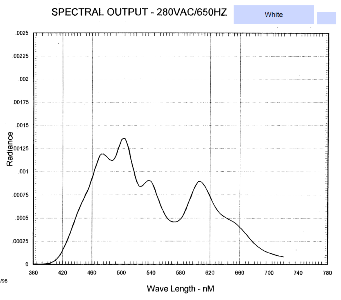
The spectral output curve on the right shows that the panel's output peaks close to the maximum sensor response of green with another peak right at red and is still quite high at the sensor's peak blue response. This would indicate that the panel should work well for the KAF-8300C. Unfortunately this did not turn out to be the case.
I ran a 4 second exposure with the panel on the end of the 5 inch refractor. The average
of the blue pixels was about 4000 while the average of the red pixels was about 58000; way
out of balance and not good for a flat field frame. Clearly, if I wanted to use the panel,
I needed to adjust its output curve.
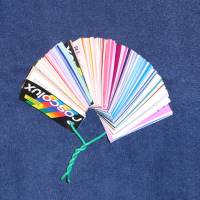
I ordered a set of filter swatches from Roscolux to try to transform the output of the panel to something that would stimulate the sensor more evenly. The samples in the swatch book are only 1½ inches high, so I powered up the panel, laid a filter swatch on it, put the camera face down directly on the filter and took a picture. I did this over and over, starting with blue filters since I knew I needed to cut out some red and bring up the blue.
To make a long story short, if you are using the FLATLITE panel with a KAF-8300C based one shot color camera, you need the following filters:
For the f/8 5 inch refractor, I use a 6 second exposure and shoot 20 flat field frames. When I generate a master flat field frame, my pixel average is typically around:
As you can see, the blue is still a little low, but it is well into the linear response area of the sensor, so this is a very usable flat field frame.
I ordered the filter gels from
StageLightingStore.com.
The web site is slow, the gels are cheap, and shipping is expensive, so I got 3 12 inch squares
of each color, knowing that I will eventually need to make another flat field box for the 10
inch RC.
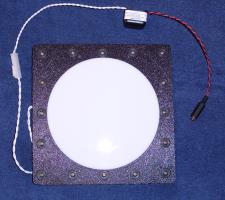
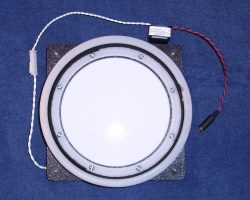
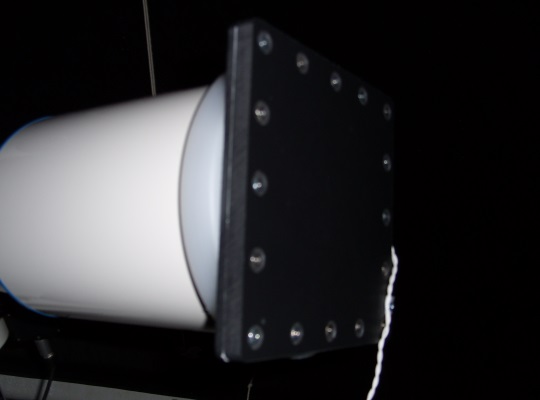
To build the flat field box, I used three pieces of black plastic about 8 inches square and ¼ inch thick, one piece of translucent white Lexan about 7 inches square and ⅛ inch thick, and 1 piece of white nylon about 9 inches square and 1 inch thick. The black plastic and white nylon were from my scrap pile and I bought the Lexan from a local plastic supplier in Albuquerque.
I cut the black plastic into 7½ squares, rounded off the corners and cut 6 inch diameter circles in two of them with a router and circle jig. I mounted the EL panel on the piece without a hole, put the two gel filters between the two with holes, screwed them all together to create the flat field box. I had to use lots of screws to reduce the light coming through the cracks.
I cut a 6 inch circle out of the Lexan. Since I didn't want a radius hole, which the router circle jig requires, I used the circle jig to cut a template out of plywood, taped the plywood to the Lexan and used the router table with a template bit to trim the Lexan to match the plywood. This gave me a clean circle with no hole. This is the final diffuser and is what presents the light to the telescope.
I had to line the 6 inch holes in the black plastic with a white plastic strip. The black hole edges were causing non-flatness around the edge of the field. Adding the white to reflect and diffuse the light at the edge of the holes fixed it.
Finally, I made the scope ring by using the router and circle jig to cut the white nylon to slip over
the end of the telescope--like a really thick lens cap with a 6¼ inch diameter hole in it.
I screwed this onto the front of the flat field box and used stick-on felt to adjust the fit to
the telescope.
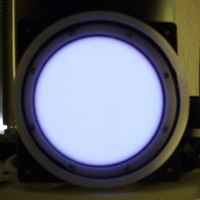
When powered on, the flat field box definitely has a blue cast, but as you can see by the pixel averages, above, does not come out too blue in the flat field images.
The box works well. I actually think it is a little small for the 5 inch refractor. It illuminates a six inch circle, but the refractor's dew shield is larger than 6 inches so I think I'm getting a tiny bit of vignetting. I think I'm going to make a new scope ring to fit the 4 inch refractor and use this box for that telescope. I have to make a larger box for the 10 inch RC anyway and I can include an adapter to use it for the 5 inch refractor. That way I will definitely cover up to the edges of the dew shield and I'll know that any vignetting is due to the optics.
In conclusion, electroluminescent panels work well for one shot color cameras if you add filters to
correct the panel's output to match your camera's sensitivity. They are more expensive, but are much
more compact than LED, incandescent, or florescent based boxes. They don't use a lot of power and,
at the duty cycle of a flat field illuminator, should last a really long time.